Category Archives: exterior

The Taming of the Forsythia

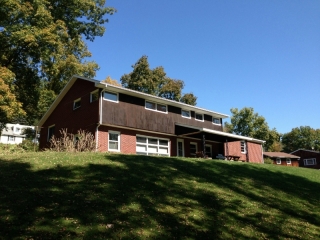
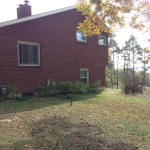
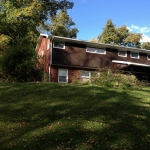
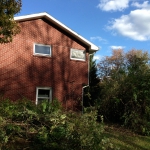
In several places on the property we have forsythia bushes. They’re very pretty in the spring…for about three weeks. The rest of the year they are either dormant or just big and green. It isn’t that we don’t like them…but left to their own devices and planted in the wrong spots, a forsythia will grow completely out of control…like the ones on the back corners of the house. Here’s a shot showing the bigger one. It’s almost 20 feet tall. It is so large that when we were kids, we built a fort in the middle of it:


I have some plans for landscaping around the house, and they don’t really include the forsythia bushes. Over the summer I tackled cleaning up our front landscaping, though there is more to do there next year as well. We will probably leave the giant one next to the road so we can enjoy the color in the spring, but the ones around the house definitely have to go – they occupy the flattest places around the house and take up an enormous amount of it. So after Mary and I got settled back in from the wedding and honeymoon, I set about at least starting on the project of chopping down the forsythia. This is a multi step process. If you’re not familiar, a forsythia is a giant mess of woody stems. If they touch the ground, they root in that location and the plant grows outward. It creates a nearly impervious thicket. To cut it down required a lot of time with the lop pruner, basically going after each individual branch. Eventually, however, I did prevail and got step one completed: the forsythia is now just a big set of stumps.


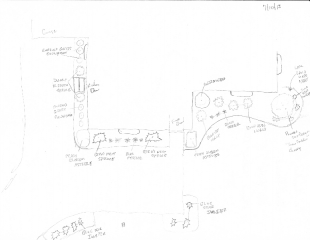
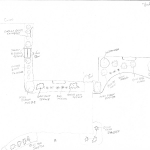
Sounds great, right? Well, besides hauling away the cut branches, that isn’t enough to actually kill a forsythia. Left alone, those stumps will grow into yet another giant forsythia bush. Digging them out will require some heavy duty labor, potentially with mechanical equipment, so I am saving that for the spring. I have a whole plan for the back that includes putting in a bluestone sidewalk around the garage (originally there was a concrete sidewalk, but it was removed in the 70s after it fell apart), removing the raised flower bed my grandparents put in in the 80s, and extending the landscaping beds around the sides and back of the house, since it will look very bare. But, I do have a plan for that, too:


(Coincidentally, I also have the landscaping plan from the last time the house was landscaped, in 1997…)

Come spring, besides expecting a baby (end of April), I will have my hands full outside finishing the landscaping as well.

 

Hickory Trees and Nuts

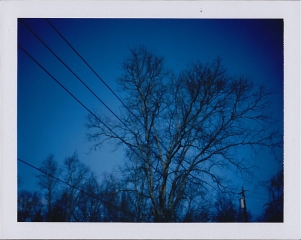
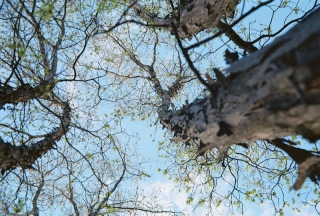
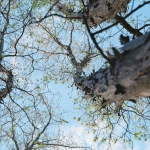
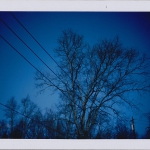
We have a few Shagbark hickory trees on the property. I’m not sure if they were planted by my grandparents or not, but they have been here since the house was built, based on the pictures I have. They’re really spectacular trees for a few reasons. First, they are a very good looking tree any time of the year. In the winter, even without leaves, they have a very strong and visually appealing branch structure:


This is the first picture I took with the Polaroid, the day after we moved in.


This one was shot with my Grandfather’s 1956 Exakta 35mm SLR camera, taken in the spring.

The shagbark hickory is truly awesome, save for one small detail – every few years, it produces so many nuts the ground is covered and feels like a skating rink. Fortunately, when we got our new lawn tractor I made sure purchased a lawn sweeper. So picking these up, while a hassle, was not the end of the world.

But the best part about all those nuts? They’re edible! Hickory nuts are in the same family as a pecan. Shagbark hickory nuts are actually sweeter and tastier than pecans. So why do we all buy pecans at the store instead of hickory nuts? Economics. Hickory nuts are smaller and much more difficult to crack open and get a “half” nutmeat. For pecans this is (relatively) easy…so pecans are commercially viable to produce, but hickory nuts are not. But if you want to invest a little time (like I do) and collect and shell them yourself, you’ve got your hands on some great stuff. When it comes to using them, it’s very simple: Anything you can do with pecans, you can simply replace with hickory.

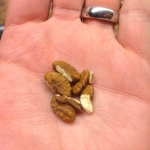
As the fall went on, and the nuts all fell off the trees, I collected a few buckets of them. A few days before Thanksgiving, Mary and I spent an hour or two in the basement cracking shells and pulling out the nut meat, and she used them to make an amazing hickory nut pie. While it was certainly a fair bit of work, the reward was worth it. A hickory pie has the same great taste of a pecan pie, but hickory nuts have a sort-of “maple” taste to them as well.

If you wanted to try your hand with hickory nuts, there are people on the Internet who sell the nuts from their lawns more or less ready to go. It is worth it.

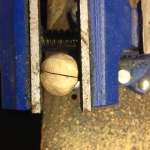
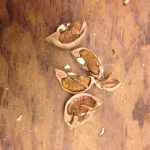
Here’s my hickory nut cracking process:

Shut The Front Door

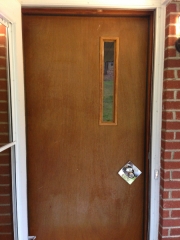
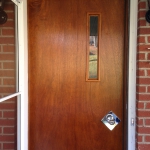
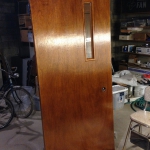
A project that had been on my to-do list since before we moved in, but was always put off, was refinishing the front door. The house has a solid wood birch-veneered door. It’s a pretty sweet mid-century touch, but the exterior side was in need of some TLC. Before she moved out, Grandma had told me that she had stained\polyurethaned the door previously, but I wasn’t sure. Years of exposure to the elements and indirect sunlight had dried out the finish. The interior side was in great shape, however. Here’s the before look:


First a note to all of those who think they should just replace their doors: Solid wood doors are not only more aesthetically pleasing, they are just as (or nearly as) efficient as metal or insulated doors. If you have an older door that lacks or has minimal weatherstripping (like ours), you can add good weatherstripping yourself with a small amount of effort (another story and another task.)

I originally through I would stain and polyurethane the door. I had always had trouble figuring out what color the stain was – none seemed to match. Turns out my father in law mentioned one day that he thought that, given the age of the house, most things were shellacked instead of stained and polyurethaned. His hunch was accurate – everything in the house is generally finished with amber shellac. I will point out that this stuff is much nicer than stain\poly to work with and turns out a finish that looks more natural and much warmer.

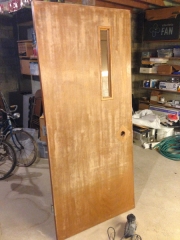
To refinish this door, I took it down into the basement and sanded it. To start I needed something pretty beefy, so I used 60 grit, which will take anything off pretty quickly. I then moved on to 180 and 220 sanding to smooth the surface out. It’s important to note that if you want a uniform finish color, you need to be thorough in terms of what you remove – if your base still has spots of old color, they will show up in your finished product as darker spots.


This project took a few days to complete, but working with amber shellac was much, much easier than stain and poly. Shellac does not smell the same as stain, and it can have a second coat put on within 1-2 hours. It is also a one-step finish – the color and the protectant seal are in the same application. You do not have to stain, then wait, then poly, then wait, then put a second coat of poly on.

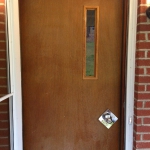
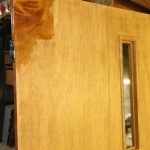
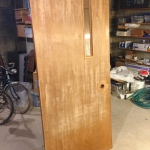
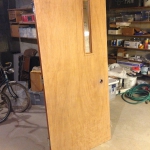
Here’s the progress from start to finish:

What’s in a Name?

How did this blog come to be named “The House on Rynkus Hill”? It seems obvious, since the house is situated in a neighborhood on top of a hill. But, it’s more than that – Grandma used to talk about all the things that happened when they were younger and had just built the house. At the time, the neighborhood had many, many more children in it than it does now, and they had three kids they were raising too.

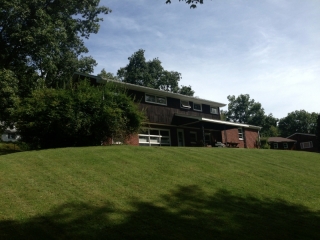
As it turns out, this lot provides a really great place to go sledding in the winter. It’s relatively tree-free, and has a nice sloping run from the street all the way to the tree line in the back – the perfect distance to sled down but not be daunted trying to walk back up. So, the kids used to say they were going to go sledding – “over on Rynkus Hill.”

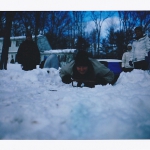
My brother, sister, cousins and I sledded on the hill too when we were kids. Coincidentally, we still do. This was in January, shot with the Polaroid:

Landscaping

Summer is the time to work outside, especially here in the northeast. So when it got warm I switched gears from mostly inside projects to mostly outside ones. A lot of projects got tackled this summer – the meadow out back was tamed, and I began cutting down the giant forsythia bushes alongside the house that were threatening to eat the place.

In July, we really got going on the landscaping out front. The landscaping around the house was put in place in 1997 – I know because not only do I remember when it happened, but I happen to have both the bill and planning grid from the nursery. Grandma saved everything. When first planted, the landscaping was very nice, but I do not believe that they gave much attention to the adult sizes of the plantings. Over the ensuing 15 years the various items had grown together, and the deer devoured several things, resulting in Grandma replacing a few shrubs.

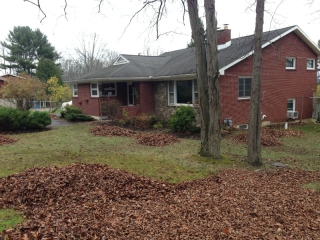
Generally speaking, we are minimalists, so the idea that less is more is pretty much a given around here. The landscaping wasn’t terrible when we moved in – in spring 2011 Mary and I came over and re-did the mulching and such for Grandma. But it needed some re-thinking regardless and some items were definitely overgrown. So you have an idea, here is where we started, this photo is from a few weeks after we moved in. I raked all those leaves by hand. (this year I have a “leaf sweeper.” Fool me once.)

Continue reading