Monthly Archives: June 2021

Airstream How To Make Curtains

At this point in the project, I’m now mostly into the soft goods and finish work. The project is in the home stretch! In this post I’m going to go into detail about how I made the curtains.

We decided on what fabric we would use (Premier Prints Bloom in Maya color way) for the curtains several months ago, but I was still a undecided on the construction method. How simple should they be? Do they need a backing liner? Pleats or no? Do they split in the middle or go to only one side? I used a sample of my curtain fabric and hemmed the edges to test – it didn’t hold shape very well and looked kind of cheap when I did a test install. After much Internet research I came across an older blog post from another Airstreamer called Straw Cottage that had a great post on how she made her curtains. When I saw her post, I knew that was how I wanted to do it. Of course, this was a more complicated way to make them. I’ll go through the steps in detail here.

First of all, the key to getting nice taut curtains in the Airstream is buckram. Buckram keeps the tops and bottoms of the curtains stiff to help them hold shape and look nice. I also decided that lined curtains would look best too, though our Airstream has double pane solar tinted windows from the factory so fading\heat gain are less of a concern for us. I used a basic white bed sheet as the liner material which is inexpensive and works well.

Now that I have my materials, the next steps are to cut the fabric to size. Some small upfront things: You need to remember a seam allowance (I did 1/2 inch.) When sewing curtains, you match the pieces inside out (the fronts face each other) while sewing and turn it right-side out after completion to get a hidden stitch. Also, I wanted the sides of the curtain material to “wrap” around the back. Doing this prevents the liner material from peeking out when looking at the completed curtain. So, I determined the size of the curtain needed and cut the curtain material with a 1/2 inch seam allowance on the top and bottom, but a 1 inch seam allowance on the sides. For the liner, it has a 1/2 inch on the top and bottom and no seam allowance on the sides. It’s difficult to explain and hopefully the pictures will help, but when you do this and press the fabric, your seam will not be on the edge and instead will fall 1/4 inch from the edge on the back, making it nearly invisible. You can see this in the pictures below showing the progression of how to measure, pin, sew, turn right side out and finally press the sides to create the crease. Note this stitching is *only* the two sides. Top and bottom is next.

With the sides completed and the curtain turned the right side out you now need to add buckram to the top and bottom and sew it in. I used a four inch buckram and thought it looked good, your preferences may be different. Buckram gets cut to size and then inserted into the top and bottom of the curtain. Once inserted I wrapped the curtain fabric around the top edge so it will be hidden. Then you pin it in place and sew it in at the top and bottom – that means four total stitches, two for each piece of buckram as that holds it in place. This stitch will be visible in the finished curtains, so I used a short straight stitch. Make sure you stitch your corners carefully to capture where the various edges meet for a nice finished look.

The last part is curtain tabs. Airstreams typically have two types of curtain tabs – G and T. G tabs are most often used for side curtain tracks where the tabs will be hidden behind the finished curtain. T tabs are used for applications where the track is above the curtain and it dangles down. There are of course exceptions over the years. Our Airstream uses G tabs almost exclusively. You will need a *lot* of curtain tabs. I used around 175 for all of my curtains. I used a zig-zag stitch set to be very short and went back and forth many times to provide strength. Some notes: I spaced my tabs about five inches apart. You need to leave space at each end of the curtains – the outside to allow for a snap to be installed and the middle to allow for overlap between the two curtain edges. At the middle edges of each curtain I also put two tabs close together. This helps with both strain relief and how the curtains look – the end tab keeps the remaining curtain straight so the two meet nicely, while the second tab allows the curtain to form natural pleats when opened. The last part is to install the curtain and put snaps on. Snaps go on some of the outside edges where there are privacy concerns. When installed they pull the curtain towards the wall, closing up any gaps. They’re not really visible in my pictures, but there are snaps at the top and bottom of the outside curtains. They are easy to install yourself, the kit includes the proper tools to get a professional finished look.

With all of these steps completed, you now have a finished and installed (pleat less) curtain. Next – a run down of how I made the upholstery.

Airstream Flooring, Counters, Media Systems

After building all of the frames for cabinets, the next step was to get the flooring down and countertops made. While I was at it, I finished the media system installations as well.

One of the biggest single changes to make the trailer feel complete is flooring. Up to this point I had just been working on the subfloor. Some people when they renovate choose to lay flooring on the whole trailer before they install anything else. It has some advances – fewer cuts, flooring is even under your cabinetry and in storage areas, etc. But, it adds a lot of weight (and cost) because it doubles both of those. We went with a luxury vinyl plank flooring from Floor and Decor in a color way called Twilight Ash and in a herringbone pattern. Herringbone is more difficult to install but it looks a lot nicer and it effectively hides out-of-square places like where two walls are not precisely parallel to one another. It also requires some planning to make the joints line up where you want – you don’t want to get further down the line and find out that there is a too-tiny piece of flooring where it meets the edge of the kitchen cabinets, for instance. Because of that, the flooring starts slightly off-center in the bedroom but that makes it line up really well down the entire length of the trailer. The flooring install took 4-5 days, though I still have to finish the shoe moulding trim.

For the countertops, we wanted something that had a retro vibe without being too in-your-face. Ultimately, we landed on Wilsonart’s Yellow Glacier Boomerang. It’s predominately white and the pattern is subdued at a distance.

Given the custom sizes involved and the interest in making sure we keep things as lightweight as possible, I had to build the countertops. A normal countertop in your kitchen has an edge around 1.5-2″ in depth, even if the actual countertop underneath is thinner. To keep with the scale of the interior of the Airstream where we have cabinetry using somewhat thinner wood and the fact that everything is so tight, I decided it would be best to build 3/4″ counters. We decided that we would want them to be aluminum edged as well – it’s more durable and will match up nicely with the Airstream interior. For that we used 13/16″ fluted T edging from Eagle Aluminum.

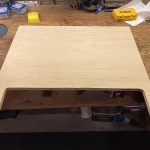
To make the countertops, the first step is to cut the foundation boards – 3/4″ particle board which is straight, true and flat – and dry fit them onto the cabinet bases. I think made minor adjustments until I got the fit I wanted and cut any larger openings for items such as the sink, cooking range, and garbage can before moving on.

Once those are all cut, the task of laminating is a chore in itself. The laminate comes as one gigantic (12′ x 5′) sheet and I had to plan out all of the cuts for all the pieces, then successfully make all of them without chipping or damaging the formica. Once you have cut pieces you are ready to glue it down. This involves using contact cement on both pieces, letting it cure for awhile, then carefully attaching them to one another and using a J-roller to get good attachment and make sure there are no air bubbles trapped.

After laminating, the laminate needs to be trimmed to size – this is done with a templating bit on a router and running it along all of the edges to make them align with the particle board edges.

Next is the edging. The edging is 13/16″ because the laminate has dimension too – so the particle board at 3/4″ plus the laminate at around 1/16″ gives you a countertop that is 13/16″ in height. The edging we used has a friction-fit T channel on the back. You use a router with a bit designed to cut a slot and, after aligning it properly, cut the slot all around the piece and tap in the edging.

Once all of these steps are completed, the counters are ready for installation. The photos show the progression of the lamination and installation of the table assembly. Note that I reinforced the flooring where the table attaches – it so happens that it hits precisely zero metal framing members.

Last, I also spent some time completing the AV installation. In my previous post I had a photo of the Furrion DVD entertainment system, but now I also was able to install the TV mount, replace the speakers, install the cellular booster and plug everything in as it should be. I used a 19″ TV that runs on 12V power as well as 120V too, so if we are dry camping we can still watch TV.

Next up – curtains, upholstery and building all of the drawers!

Airstream Cabinetry

In the previous post, I detailed the work done building the dinette and the bathroom cabinetry. But there’s still a lot of other cabinetry left to do – the kitchen wall, a housing for the refrigerator, a small entertainment system area, microwave cabinet and a big bank of drawers we are referring to as the bar (because it has a bar-height countertop on it.)

Weight is always a strong consideration when building. The original curb weight of this trailer was just shy of 4,700lbs – which for a 31 foot trailer, is not particularly heavy. Airstream made fairly extensive use of (then relatively new) plastics for all sorts of things to cut weight.

I, however, am building most everything out of wood. In most cases, wood is heavier than plastic. Also, the visible pieces are maple – which is a dense, heavy hardwood. So, I spent a lot of time considering construction methods to minimize weight. A lot of people renovating Airstreams head to Home Depot or IKEA and pick up cabinet boxes, chop them up until they fit, and use those. This method works, but the cabinets are heavier. I instead opted to build a series of face frames out of relatively small 1×2 dimensional maple, then attach them using 1×2 select pine to aluminum L channel on the wall. This method means there are no cabinet walls and the support for the cabinetry comes from the multiple attachment points between the wall and face frame. It also makes the entire assembly lightweight.

First up is the refrigerator cabinet. This cabinet is a little unique compared to the others because we are putting in a standard Dometic-brand RV refrigerator and it will have a flue (chimney) requiring venting. These units run on electricity as a primary and propane as a secondary fuel. They also use a different technology to cool than your home fridge. Instead of a compressor for cooling, they are an “absorption” fridge. In this type of fridge, the refrigerant is ammonia and heat is applied to the ammonia as it cycles through the system. Through this process, heat is removed (absorbed) from the fridge interior and pulled outside. Because it only requires heat to function, it can work on propane without any issues. These refrigerators require a reasonably tight box to install and then there are two vents, one at the bottom and one at the top in back. First I built a frame out of pine, and a frame frame out of maple, then applied 1/4 maple plywood to the completed frame. It is installed in place with aluminum F-channel to the wall and any joints are closed up with butyl caulk in the back. The top of this cabinet has a countertop of maple veneer with a fluted aluminum edge. I chose to use maple veneer instead of a laminate (formica) because the upper part of the fridge is not space meant for things like setting drinks down, etc.

Because the vents for the fridge were pre-existing, I built that cabinet first since its placement effectively determines the precise size of the rest of the cabinetry down the line. The next cabinet houses the microwave, which has a drawer in the middle and hatch on the bottom for kitchen storage. This frame is then directly attached to the frame of the microwave cabinet to make them stable and keep them all straight and in line.

After installing the microwave cabinet I have the dimensions for the bank of drawers. This is a 9-bay opening with six drawer fronts and three drop-open doors to access the utility equipment (breaker panel, water pump, vacuum) at the bottom. When completed, all of the doors will all be shaker style in maple with maple plywood insets.

All of these are done with pocket screw joinery (except the cabinet doors which are just glued after being cut. Because there are no sides to each cabinet, I also needed to install wood rails to mount the drawers slides to. To make this process easier, I attached whole pieces of aluminum angle to the wall for each wood rail to land on. Doing it this way turned out to be much easier than the process I used in the bedroom because I can align the rails with a square as I install them, ensuring they move smoothly. In the bedroom I spent a lot of time adjusting the slides since they only had “end cap” attachments.

Next, on the other side of the fridge I built a small console for holding the entertainment system – a small TV and the Furrion DVD entertainment system. It’s a single unit that can play DVDs to the TV, has a radio, bluetooth, be surround sound for the TV and pass HDMI signal through to the TV from connected devices. The unit has a two shelf bookcase as well. The shelves have a small lip on the front to prevent things from spilling everywhere during transit, too. Just to make this cabinet complicated, it also has a radius curve identical to the one from the dinette.

Last up is the kitchen cabinets. This one is also complex – there are technically three parts to this cabinet – the end cabinet with the radius curve, the oven and furnace mounting location, and the sink area. The furnace determines the precise location of the cabinets to start since there needs to be an opening large enough at the bottom to service the unit later. The same process was used to build this as the bar cabinets – maple frame frame with 1×2 pine supports.

As I was finishing these cabinets, I was also dry fitting the countertops and preparing them for lamination too. In the end, these came out looking the way I expected, too.

Next up is flooring, countertops and drawers!