A lot has happened on our Airstream renovation in the three weeks since the last update. I was taking a week of vacation and we had a list of tasks to complete on the Airstream. We also have a high-level timeline. To start, let’s review the staycation goals:
- Finish removing old wood flooring
- Finish preparation of trailer frame including wire brushing, priming and painting.
- Rebuild picture window, stretch goal of having window installed.
- Clean (paint strip) the exterior.
How did we do? Well, we hit all of our goals. Huzzah! The stretch goal was not doable – I had the old window removed, but we did not install the new window until the middle of the following week.
I went back to work the following week and we did more small things each day, but I then took a second staycation week during the last week of the month too. The goal here was to get the sub flooring installed – more on that later.
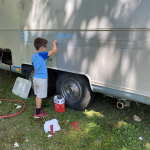
Cleaning up the frame of the trailer and and the exterior took an enormous amount of time during the week. This process took the bulk of our time. We used Rustoleum Aircraft Remover and slowly worked our way around the whole exterior of the trailer. Fortunately for us the clear coat had been stripped off previously, so we were left to focus on the stripe, the belly wraps, and the roof. But even so, this took all week. Stephen wanted to help as well, so he got in the action.
For the frame, I finished pulling the remaining wood out and wire brushed the whole thing. Our frame was in generally very good shape – only the bottom edges of the outriggers had real rust issues. We used Corroseal rust coverting primer on the whole frame to prep (seen in picture below – the one with white stuff on the frame.) Finally we painted the frame with Rustoleum Gloss Black enamel and used a catalyst hardener to make the finished paint extremely durable. You can see in the photos of the tongue how much of a difference just the corroseal makes.
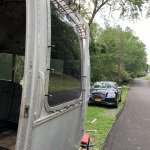
The windows in this Airstream are dual-pane. The factory made them in-house. They are basically two panes of glass with butyl putty, some spacers, desiccant sprinkled in the putty, and a foil wrap with a vinyl gasket inside a frame. This setup inevitably let in some moisture and over the years they often get hazy. Fortunately ours have tinted glass panes and not a tint applied. The applied tint almost always bubbles up. Because this window is fixed, it is extremely difficult to remove and re-install. As such, I decided it would be appropriate to rebuild it now before reinstallation. Fortunately there is a guy who runs a place called Vintage Trailer Gaskets and he has lots of documentation on how to do the job and stocks all of the parts needed. So, with $40 of needed parts in my hands I set out to disassemble the old window, clean it all up, and rebuild it. It took some effort to dismantle the frame, but once that was done everything went smoothly. We reinstalled the window the following week. Those little items that look like bullets are called clecos. They are a temporary fastener for riveting that hold your pieces together while you work.
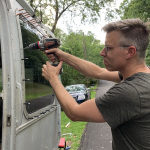
Speaking on re-installing the window. Doing so ultimately requires you to learn how to do buck riveting. Buck rivets are the type of rivets used on the exterior panels of Airstreams (and airplanes.) A buck rivet is extremely strong and essentially water tight when done correctly. It is superior to a pop rivet. The catch is that to put in a buck rivet, you have to have access to both sides of the rivet, with a second person holding a “bucking bar” (essentially a small anvil) so that you can smash the rivet correctly. Airstream has a nice rundown of how this all works. I picked up a pneumatic rivet gun and rivet set, bought some rivets and set on our way. I did some practice riveting and it took Mary and I a few tries to get the process down correctly, but now we can do buck rivets anywhere. Since we had all the interior skins off anyways, after we were done installing the picture window we went around and buck riveted in any other holes we found from other things (particularly in the roof) like pop rivets for old attached items.
For my second staycation week, the goal was to have the subfloor installed. However, at the beginning of the week it dawned on me that I didn’t want to install a subfloor until I know that the trailer was water tight (or at least with no significant leaks. It is an aluminum tube with 4000 rivet holes, after all.) So, my focus for most of the beginning of the week was to get all of the exterior “bits” put back together and reinstalled. This meant installing all of the lighting, badges, roof vents, etc, that we had previously taken off.
I rebuilt the tail light assembly using a kit I found on eBay with the same lenses. I modified that kit’s buckets to fit into the Airstream frame, which is curved. One interesting features of this era of Airstream trailers is a fiber-optic tail light indicator. Basically one of the tail lights on each side has a lens that feeds light into a fiber cable and the other end appears on the street (driver’s) side of the trailer towards the front. It is visible in your rear view mirror when driving and allows you to verify that the trailer’s tail lights are functioning. I modified the buckets from the replacement assembly to take the fiber optic monitor as well. For the marker lights I modified them as well with eyelet connectors for their neutral wires. Because the shell of an Airstream is metal, most lighting uses the aluminum shell as the neutral. The fastest way to do this is to add an eyelet to the neutral wire that is fed through the mounting screw.
By mid-week we had all of the exterior accessories back on, had installed replacement items like the new bathroom fan, and had done a first-step polishing around the spots where all those accessories go. I repaired one of the vent skylights that was clearly leaking and we installed a patch where the battery box used to be (we are using AGM batteries that do not need an exterior panel.) After installing the trailer umbilical, we tested the exterior lighting using the Jeep and everything looked great.
The last step was a water test. This took a few days – testing was done, leaks were checked and sealed, then another test was done, etc. It took four tests to get things satisfactory. There are two competing design goals for water here. First, you want to minimize leaks as much as possible. Two, you know water will get in eventually, so we need to make sure it gets out easily so it doesn’t cause damage. Satisfying part one takes some trial and error. To satisfy part two, the best approach is to use materials that are less likely to be damaged by water exposure and plan for what happens when water does get in.
The last thing I did was install some new belly pan where the old one was damaged beyond repair. I bought enough to do most of the belly aluminum, but will hold off until next year as what’s there is in decent condition, though with some minor corrosion.
With those steps done, we were finally ready to start installing some flooring. We did some test fitting of the first pieces – the rear curve – at the end of the weekend. So our revised goal is to have the subfloor installed by the end of Labor Day weekend. We’ll see how we do!


