Category Archives: rambling

Calling Mr. Camin

So in our kitchen we had the original wall-mount telephone jack. Straight from 1960, it even has the Bell logo on it. Talking to my mother and aunt about it before, they mentioned that there was always the kitchen phone when they were growing up – a big boxy rotary phone – and it was the only phone they could use. The only other phone was in my Grandparent’s bedroom. I even recall it there when I was a kid. By the late 1980’s it had been switched out for a cordless phone, and when we moved in a cheap white corded phone was hanging there.

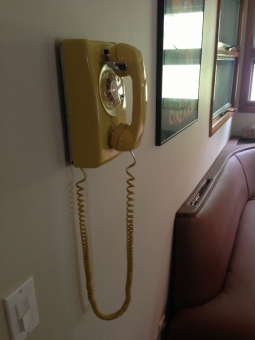
For the kitchen, I found a great vintage phone – a Western Electric 554A/B in yellow. It’s the rotary phone you think about when they say “old kitchen wall phone.” It’s built like a tank because, at the time (pre-1984 breakup of AT&T), the phone company owned the phones – you simply leased them. If it broke, they had to repair or replace it. It turns out it’s a great accent in our kitchen and complements the yellow backsplash tiles (original) and Rejuvenation Astron pendant lights over the banquette. It’s practically a piece of mid-century art on the wall:


But of course with no landline, this would just be for show. I wanted to correct this, though. After doing some research I figured out that I could do more – much more in fact.

I got to thinking about how it would be great if I could still actually use these phones around the house. Given that our cell phones have bluetooth, surely there must be a way to link all of this together? It turns out there is. A little bit of research led me to purchase an Xlink BTTN “Bluetooth Cellular Gateway” – this is basically a device that, when your cell phone is in the house, uses Bluetooth to connect the box to your cell phone. When someone calls your cell phone, it rings any phones (like your home ones) connected to it. You just pick up any phone to answer. Another call comes in? It supports Call Waiting. Have a Caller ID phone? It will send the Caller ID to the phone. It links three separate cell phones to the device and can juggle them. Oh – if you have an iPhone, you can pick up any handset, dial ## and use Siri too. It’s pretty spectacular. The only real limitation is that Bluetooth only works within about 15 feet, so you have to leave your cell phone near the device. I don’t want this limitation, so I’ve ordered an external antenna and am going to hack the device to enhance the Bluetooth range.

But now for us, the bottom line is that when someone calls us on our cell phones, we don’t have to run across the house to figure out who it is – the kitchen phone rings (with it’s awesome bell ringer), and our cordless phones get Caller ID identifying not just the number but (if the person is in our phone book) the name of the contact as well. We can literally grab any phone to take the call.

VCT Floor Care

When people see our vinyl tile (VCT) floors, they usually ask how we get them looking nice and shiny and keep them that way. The old school way – the way my grandparents did it – was to put paste wax on and sit with the electric buffer. (I have one of these in the basement, by the way. It’s pink.) The tile did shine, but it was slippery.

I have developed a super-secret process for cleaning the floor and adding a fancy wet-look polish, and I have decided I shall release this super-secret process to the world so all VCT floors everywhere can enjoy this level of shine, since I get asked a lot.

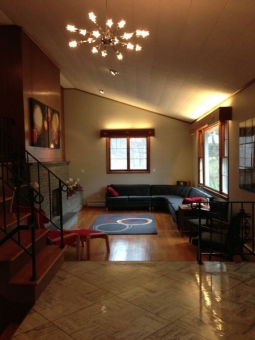
So you can see the results, our foyer floor looks like this now:


Without further ado, here is how we get that look:

1. Clean it with “Krud Kutter” spray. This stuff is awesome. You spray it on, let it sit for 30 seconds or so, then give it a good scrubbing. You’ll notice that your tile will return to it’s original unfinished matte look. I did this with rags on hands and knees for best results.

2. Using a damp microfiber twist mop (they have nice ones for $10) put on Zep Stain Resistant Floor Sealer. I do two coats – you wait about 10-15 minutes between each coat. The stuff self-levels so you just spread it on with the mop and are good to go. You’ll notice a light sheen coming back on the floor. This step prevents anything from staining the floor if it gets on it. VCT floors will absorb spills if they are not protected so this is very important.

3. Rinse the damp mop and switch to Zep Wet-Look Floor Finish. I put on 3-4 coats, waiting 15-20 minutes between each one. You won’t notice it getting real shiny until the 2nd coat dries. This also self-levels so you just make sure you don’t miss spots and you’ll be fine.

I didn’t need a lot – one gallon of each of those covers something like 300-400 square feet. The other cool thing about the Zep products is that while they are shiny, they are not slippery. Apparently they formulate the wax so it shines without turning your tile into a skating rink, which is awesome. The very first time I waxed the foyer floor I used old-school SC Johnson Paste Wax (the original stuff) and buffed it. It wasn’t as shiny as I wanted and it was downright dangerous, unless we were doing Tom Cruise “Risky Business” re-enactments.

And there you have it, the super-secret vinyl tile floor care method.

Meet Jasmine

A bunch of things came with the house when we moved in. My grandmother, mother, and aunt had generally picked over the various things they wanted and when we started doing work in the house, we were pretty much left with a handful of items that we were keeping (the large couch, end table, some bedroom furniture upstairs)…and a ridiculously large pile of junk that became our responsibility to dispose of. That tale is a whole other story for a whole other day.

At her new place, my Grandmother was not convinced she could take her cat. She was moving into a really great senior living facility (Castle Gardens in nearby Vestal) and while they allowed pets, she just didn’t feel that confining her cat to her apartment was the right thing to do.

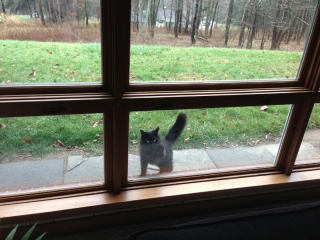
So…Mary and I, along with a large pile of leftover household items, inherited a little fluffy black cat that knows how to shake for treats, is used to be conversed with on a regular basis, and generally wants to be treated like a princess:


It took some adjustment (she now primarily sleeps and lives in the basement when indoors) but she’s adapted quite well to her new owners, including informing us of when she wants in:

Bike Work

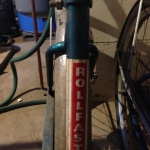
Among the things left in the house are these two vintage bikes. They’ve been down in the basement, unused, since probably late 1970s. I’m pretty determined to fix them up as a hobby project. Turns out there is a rather interesting market for vintage bikes and bike parts. Those hipsters!

Grainy shots of the bikes, currently squirreled away in the back corner of the basement:


Mid Century Compatible

If you look around a bit at some of the other house blogs we read (right side under “What We Read”), you’ll come across some pretty cool things. One of the coolest things are “time capsule houses” – these are houses that are listed for sale around the country where the interior is virtually unchanged from the time they were built from the 1940s – 1970s, like Robert over at Live Better Electrically. They often have ridiculously cool vintage appliances, the type of stuff that was “the latest innovative tool” at their time, but for economic or style reasons never caught on and faded away. (See: GE Wonder Kitchen.)

So, a few things: First, our house is not a time capsule. My grandparents updated the house over the years and re-did the kitchen. We do have time capsule bathrooms which are pretty spectacular. Second, our house, though modest by today’s standards, was also not a “Mid Century Modest” house at the time it’s construction – it cost $18,500 to build in 1958. The average house at the time was $12,700, so our house was a fairly fancy one and the finishes and build quality reflected that.

The renovation work we do follows an ethos I call “Mid Century Compatible” – we have a great house that was well-designed and well-built. We generally take finishes and fixtures back to how they originally looked at the time of the home’s construction and then bring in modern touches with styles that are very compatible or complimentary to the original components of the house (See: Bedroom Before and After.) We are modern style lovers in our own right, and as such we want to have a house that pays homage to it’s mid-century roots while letting the mid-century idea move forward. That’s one of the cool features of true mid-century modern style: it’s still modern.