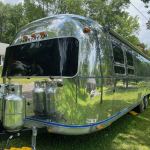
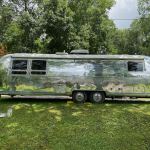
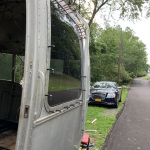
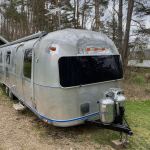
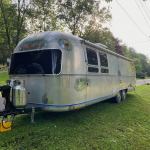
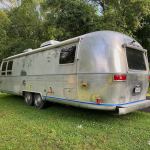
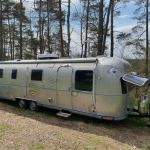
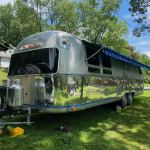
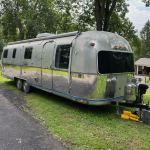
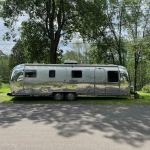
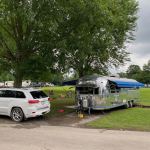
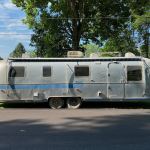
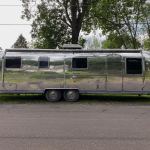
Airstream Completed Project

It’s actually been done for almost a year now, but I realized that I should post a gallery of our completed Airstream renovation project. This project started with the purchase of a vintage 1980 Airstream on July 3, 2020 and over the next year it was torn down to the metal shell and rebuilt. Other than purchasing equipment and appliances, all the work was done by us – demolition, cleaning, carpentry, plumbing, electric…even sewing the cushions and curtains.

Generally speaking, the original floor plan was retained for the reconstruction. This trailer is a “Center Bath Rear Twin” model – in the back are twin beds, with the bathroom in the middle section (as opposed to the rear.) It sleeps four by way of the front dinette converting to a queen-sized bed.

While we do not use it in this fashion much ourselves, the trailer is built for dry camping – pre-wire for solar on the roof (6 gauge) and front (10 gauge) enable battery charging options, and all systems save the vacuum, microwave and air conditioner run on 12V (even the TV and stereo.) This model has a 50 gallon fresh water tank and 25 gallon gray and black tanks.

The trailer continues to use the original configuration (with all new equipment) running propane for the refrigerator, central heating and hot water. The most notable change is hot water – we went with an on-demand “vent free” model that, in a standard installation, is small enough not to require dedicated venting. In practice is has an active ventilation system shared with the bathroom exhaust that has proven more than adequate while overcoming the shortcomings of the original 6 gallon tank water heater (ie, we have unlimited hot water!)

In the pictures that follow the trailer is functionally done. There are a few things left that got tackled over the next year – new tires and wheels, some interior bits like a spice rack and separator curtains, etc. Thus far we continue to run on the existing axles as they are functional and we presently do not haul the unit around often enough to tackle that, but perhaps in the future.

Let’s start with the exterior. How we started, and how it currently looks. There is still some things to do here – I now have new aluminum rims and tires to put on, and the dual-pane tinted windows, while in good repair and fully functional, need to have the window assemblies rebuilt so the interior panes can be cleaned.

Next is the restoration process. This was a complete tear out and rebuild. Some minor things I would do differently? I would wire the rear back up camera differently (I didn’t accommodate easily replacing it if needed), I also would have flipped the beds the other direction so the antenna jack for the TV is on the wall shared with the bathroom and your head is in the curve (I followed the original layout.) Flipping that would make putting a TV in there much easier, though I did put a nice tablet mount in there and it works functionally similar. A lot of attention was paid here to weight – the cabinet construction style specifically resulted in a low overall weight.

And finally, a tour of the finished product. In the bathroom shots you can see the on demand heater and the shared floor-to-ceiling venting setup. As part of the process I tried really hard to make it as safe and compliant as a new one would be – you’ll notice the fire extinguisher, smoke alarm, hard wired CO and propane alarms, even the rear exit window has the pull loop on the screen for egress.

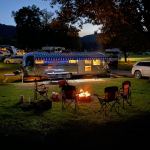
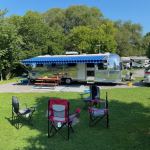
This was all done in early July 2021. We spent the second half of the summer of 2021 using the trailer extensively. It so happens that there is a very nice public park less than 10 minutes from our house – it has full hookups and a lot of nice folks. So we mostly use the trailer there and take it on the periodic regional trip. The park also happens to be used in the summer for one of our regional Airstream club’s rallies. And in another coincidence, the immediate past President of the International Vintage Airstream Club lives here in Owego, about 5 minutes away from us.

Completed, the trailer weighs in just less than 5,300lbs. The original factory weight was around 4,800, but that was before accessories like the awning kit (this trailer has a full one) were added. I did not weigh it when I first got it but I suspect it weighed around 5,000lbs. We haul it with a 2016 Jeep Grand Cherokee Summit with a V6 – its tow weight it 6,200, so we’re well within range.

We’re gearing up for the 2022 season. Now that the trailer is largely done the work remaining is generally maintenance and upkeep. If there are interesting things in that department, I’ll make sure to post them up too!

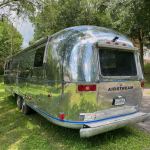
Airstream Polishing

Finally in the home stretch of the Airstream renovation – exterior polishing! From reading up on this, I knew that polishing is a brutally hard, long and dirty job. But the results at the end are pretty incredible.

For those not in the know – the aluminum panels on an Airstream can be polished to a relatively high shine with a lot of elbow grease. Different years can polish to different levels of shine, as Airstream changed the alloy used in the panels over the years. But, broadly speaking, Airstreams built before roughly 1982 used Alclad aluminum panels, which have a pure aluminum coating and can be polished to the highest mirror-like shine.

There are several different compounds for polishing aluminum. One of the most common is Nuvite, which is a polish made for aluminum aircraft. Nuvite is applied with an orbital buffer. I chose to use polishing bars which are applied with a side grinder using a buffing wheel. I tried both and felt that I could get good results with the polishing bars but it would be more economical than Nuvite. I used the kit for large Airstreams from Jestco Products.

So, this is how the Airstream looked before buffing:

Buffing aluminum is a multi-step process. Airstreams originally came with a sealant coating on them, so if it still exists on your trailer you have to strip it off like paint. Fortunately for our trailer, this had been done sometime in the past so we did not have to worry about it.

But for polishing, the first step is to make sure your surfaces are reasonably clean of dirt and debris. The second step is to use the gray “abrasive” compound as a first pass. This pass really does the heavy lifting – you can watch as it goes from dull to shiny more or less all at once. But, it is very slow. You are working on a thirty foot, eight foot tall trailer…one inch at a time using the tiny edge of a buffing wheel. Did I mention the mess? You need to wear a respirator for this process because it creates a cloud of black dust that gets on everything. When polishing I would set aside a few hours to work then immediately come in and take a shower.

After the gray compound, you get a nice finish but it will be full of very visible swirls and be relatively uneven, as you can see below.

Step three is the red polishing compound, commonly called red (or jewelers) rouge. Rouge is made for polishing already shiny metals and adds luster. The rouge will smooth out many of the swirls and unevenness from the gray compound. When you are done with the rouge you should have a really nice finish. Under most lights it will look great, though you can certainly get to certain angles where you can still see shadows of swirls and the like. You can see below, it looks great.

If you’re really up for punishing yourself, you can do the last step which is to go over the whole trailer one more time using an orbital buffer and a metal polish such as Blue Wenol. I tried this on some sample spots and did not see a noticeable enough change in the finish to want to do the whole trailer again, so I stopped a the rouge step and instead focused on cleaning up the buffing compound’s residue. This mostly involves taking rags soaked in acetone and wiping down the surface. Be warned you go through lots of rags and they are garbage when you are done.

The finished result is amazing. A polished trailer like this will slowly oxidize back to the pale gray it was when we got it, generally 5-7 years. You can slow this process down by putting on a sealant or protectant (a plasticizer is traditional), but they wear off after about 10-12 years and the trailer will resume oxidizing. In addition, if it partially fails (ie, the top starts peeling before the sides, which is super common) you have to strip the whole thing, which is a ton of work. Some people are starting to put ceramic coatings on their trailers, which is a new option. Ceramic coatings last a long time, can be reapplied easily, and don’t have the drawbacks of a plastic coating.

Or, if you forgo all of those coatings, you can just to a touch up polishing job every other year or so. Once your trailer is polished nice, you no longer have to continually do the gray polish, you only need to go over it with the red rouge. At least for now, I intend to follow the rouge route and see how I feel in a year or two when its time to touch the polish up.

With the trailer polished, it’s really completed. I did this polishing right at the beginning of the summer and we were able to use the Airstream throughout the summer. We mostly camped at a large park locally by the river, but did get a few trips in towing it to make sure everything was working well.

I think its also worth a comparison shot – the first one below is the trailer the day we picked it up. The second is the finished trailer.

Next up is a full tour of the trailer and everything put together to complete this project!

Airstream Overhead Cabinetry and Finish Woodwork

It’s been awhile since I posted updates on this project – that’s because we’ve been using the Airstream this last summer. My posts are generally 1-2 months behind where the project is. But I’m going to put up the last few posts to complete this project and show you the (really awesome) results!

In the last post, I detailed how I made the upholstery for the front bench. With that the interior was really coming together and it’s really just a sprint to finish the remaining items on the list so we can use the camper. On that list is a the overhead cabinetry as well as miscellaneous finish work projects.

In our design there are two overhead cabinets – one above the kitchen and one in the rear end cap. I had saved all of the metal extrusions that attached everything to the walls originally, and that served me well – there was an extrusion already bent at the correct angle for attaching the kitchen cabinet to the wall. This cabinet would be pretty straightforward, but I had a few extra things that added complication: first, I did not want the front at a 90 degree angle; second, it had to accept the original exhaust fan assembly; and third, I wanted recessed lighting in the bottom.

Ultimately, I built the cabinet out of 3/4 maple faced plywood for the base, which gave me the thickness to recess the lights and easily attach the front at the correct angle. It also saved me from having to veneer the finished panel. The extrusion to attach the cabinet to the wall, however, accepted 1/4 plywood, and the existing hardware for the exhaust fan assumed 1/4 plywood as well, a problem that was solved with a little router work. I built it as two cabinets then attached them to each other once installed, which made the process a lot easier. I struggled for a bit to figure out how to do the lighting I wanted, but in the end I figured out that I could route a shallow channel in the bottom, put in an LED light strip, then glue a silk ribbon right on the wood to act as a diffuser – the end result looks clean, neat and very seamless. I wired it so there is a on the bottom of the cabinet as well.

Next up was the rear overhead. This was very complex because of the continouous compound curve that I needed to fit against. I decided to do this cabinet a bit different to give me more flexibility for fitting. I started by assembling a simple frame for the base and attached some aluminum angle to the wall as part of the attachment points. I then made a template out of cardboard for the curve on the bottom side and cut out 1/4 plywood to fit it, and did that in halves. This way I could focus on trimming just the straight cut as I worked it into the cap. Because the cap is plastic, it also flexes as you put everything in, so getting a perfect fit is very difficult.

Next I framed up the cabinet itself, taking care to angle the supports to fit inside the curve. The cabinet will not have a back, only a top and bottom, which simplifies these steps somewhat. I built a standard face frame for sliding doors in the front and cut some 3/4 plywood to be fillers to the curves on each side of the face frame. Below you can see the completed assembly, fully installed.

Now on to other finishing projects. The bathroom needed a door. I was determined to create a slider door instead of a hinged one, but that also introduced some questions about how to ensure adequate privacy. I was also determined that the door be reasonably thin (3/4 thickness.) I basically just built another door similar to the cabinet doors so it matched. This also presented a different problem because sliding door hardware typically assumes two things: first, that it’s a pocket door, and second, that the door is roughly 1-1/4 inches in thickness. I adapted the Johnson Hardware 111PD mounting hardware to work and, with some shims, attached the track to the ceiling. I also picked up two Johnson Hardware Guide Posts which I mounted on the floor on each side of the door – this prevents the door from swinging outward freely. I addressed the issue of privacy on the vertical plane of the door by putting some long brush pile weather seal on the wall. Because of the way the door slides the pile (when on the left side) is never actually revealed or visible. For a lock, I made a simple one out of a strip of leather and the same snaps used for the curtains. I attached a snap to the wall, and a length of leather with a mating snap on it – it worked quite well.

Another thing to address was the various vents for forced air heat and the hot water heater exhaust. For these I used 1×1/2 maple stock, cut it in half, mitered the ends then routed each piece to accept a patterned aluminum vent sheet. Everything was then glued in place and I put them on the wall with recessed aluminum finish screws.

Originally, and in most Airstreams, the beds in the rear have some sort of fabric bumper on the walls. This is for comfort – the fabric is a warm buffer against the cold metal. I whipped up some of these using the same upholstery from the front valences, wrapped them around some leftover plastic from the shower surround which easily flexes, and put the assembly on the wall using snaps.

I also wanted a magazine holder, so I built one of those. I have plans to build a spice rack and medicine cabinet too, but those will be winter projects.

And last, I needed to finish the show moulding for the floor. Generally this is a pretty easy process, but because I built curves into the walls I had to get creative with how to make the moulding work. In the end I went with the kerf method – at first I tried to just do it to the back, so the kerfs would not be visible. That did not work. So I cut it with the kerfs visible on the top and it turned out that when installed they came together enough and, as long as I was consistent in the spacing between each cut, the finished assemble looked nice. The vintage $25 Craigslist band saw I picked up came in real handy for this. With all this done, the only part remaining was how to address the cut ends – the moulding stock was made using a vinyl wrap, so when you have exposed cut ends they are brown fiber board. I figured out that with some gray hammered spray paint and a black sharpie marker I could successfully color the cut ends so they matched the finish.

Next up – on to polishing!

Airstream How to Sew Upholstery

One of the last big projects left on the interior is the upholstery for the front U-shaped dinette. We knew that we wanted some sort of faux leather for durability and cleanability but we went back and forth over what to use and what colors to pick. I ordered different samples and we hemmed and hawed a bit – do we want to upgrade to Ultraleather, or go with something like Naugahyde? Blues or browns?

In the end, we decided this was one of the things that you touch the absolute most in the Airstream, so we decided Ultraleather was the way to go, and choose the adobe color way as it would fit well with the wood tones and not compete with the colors and patterns in the curtains (and to a lesser extent the countertops.) While figured out what kind of cushions to make, I also decided we would use underlining fabric on the non-visible faces of the cushions which provided both grip and significantly reduced the cost.

I also debated how fancy the cushions should be. Should they have a French seam? Do they need welting? How should I build the inside of the cushion? Does it need polyester wrap? For these, I landed on: Basic box cushion design with hidden seam stitching, no welting, and polyester wrap around all of the cushion foam.

The first step was to get a giant sheet of foam delivered and a huge roll of polyester fiberfill. I then cut the various cushions out of this foam sheet – all cushions have 4 inch foam inside of them. I then wrapped each cushion in polyester and stapled the edges together using a standard stapler. This is a common way to attach the polyester and the cushion cover edges make it so you can never feel the staples in this arrangement. It’s much easier than gluing on the fiberfill.

Now we are on to preparing the fabric. Measuring out and cutting the fabric is a challenge given the size, I mostly did this laid out on the floor. Once the pieces are cut, they are assembled and sewed similar to the curtains where you sew them together on the wrong sides then turn them right side out, in this case through the zipper face.

The most difficult cushion was the curved back – it took me awhile to figure out how to create this, but ultimately you cut 4″ thick strips matching the curve, then glue them into a stack of the correct height.

I’m really pleased with the completed look – once the cushions all came tougher, it really achieved the finished look I had in mind.

Airstream How To Make Curtains

At this point in the project, I’m now mostly into the soft goods and finish work. The project is in the home stretch! In this post I’m going to go into detail about how I made the curtains.

We decided on what fabric we would use (Premier Prints Bloom in Maya color way) for the curtains several months ago, but I was still a undecided on the construction method. How simple should they be? Do they need a backing liner? Pleats or no? Do they split in the middle or go to only one side? I used a sample of my curtain fabric and hemmed the edges to test – it didn’t hold shape very well and looked kind of cheap when I did a test install. After much Internet research I came across an older blog post from another Airstreamer called Straw Cottage that had a great post on how she made her curtains. When I saw her post, I knew that was how I wanted to do it. Of course, this was a more complicated way to make them. I’ll go through the steps in detail here.

First of all, the key to getting nice taut curtains in the Airstream is buckram. Buckram keeps the tops and bottoms of the curtains stiff to help them hold shape and look nice. I also decided that lined curtains would look best too, though our Airstream has double pane solar tinted windows from the factory so fading\heat gain are less of a concern for us. I used a basic white bed sheet as the liner material which is inexpensive and works well.

Now that I have my materials, the next steps are to cut the fabric to size. Some small upfront things: You need to remember a seam allowance (I did 1/2 inch.) When sewing curtains, you match the pieces inside out (the fronts face each other) while sewing and turn it right-side out after completion to get a hidden stitch. Also, I wanted the sides of the curtain material to “wrap” around the back. Doing this prevents the liner material from peeking out when looking at the completed curtain. So, I determined the size of the curtain needed and cut the curtain material with a 1/2 inch seam allowance on the top and bottom, but a 1 inch seam allowance on the sides. For the liner, it has a 1/2 inch on the top and bottom and no seam allowance on the sides. It’s difficult to explain and hopefully the pictures will help, but when you do this and press the fabric, your seam will not be on the edge and instead will fall 1/4 inch from the edge on the back, making it nearly invisible. You can see this in the pictures below showing the progression of how to measure, pin, sew, turn right side out and finally press the sides to create the crease. Note this stitching is *only* the two sides. Top and bottom is next.

With the sides completed and the curtain turned the right side out you now need to add buckram to the top and bottom and sew it in. I used a four inch buckram and thought it looked good, your preferences may be different. Buckram gets cut to size and then inserted into the top and bottom of the curtain. Once inserted I wrapped the curtain fabric around the top edge so it will be hidden. Then you pin it in place and sew it in at the top and bottom – that means four total stitches, two for each piece of buckram as that holds it in place. This stitch will be visible in the finished curtains, so I used a short straight stitch. Make sure you stitch your corners carefully to capture where the various edges meet for a nice finished look.

The last part is curtain tabs. Airstreams typically have two types of curtain tabs – G and T. G tabs are most often used for side curtain tracks where the tabs will be hidden behind the finished curtain. T tabs are used for applications where the track is above the curtain and it dangles down. There are of course exceptions over the years. Our Airstream uses G tabs almost exclusively. You will need a *lot* of curtain tabs. I used around 175 for all of my curtains. I used a zig-zag stitch set to be very short and went back and forth many times to provide strength. Some notes: I spaced my tabs about five inches apart. You need to leave space at each end of the curtains – the outside to allow for a snap to be installed and the middle to allow for overlap between the two curtain edges. At the middle edges of each curtain I also put two tabs close together. This helps with both strain relief and how the curtains look – the end tab keeps the remaining curtain straight so the two meet nicely, while the second tab allows the curtain to form natural pleats when opened. The last part is to install the curtain and put snaps on. Snaps go on some of the outside edges where there are privacy concerns. When installed they pull the curtain towards the wall, closing up any gaps. They’re not really visible in my pictures, but there are snaps at the top and bottom of the outside curtains. They are easy to install yourself, the kit includes the proper tools to get a professional finished look.

With all of these steps completed, you now have a finished and installed (pleat less) curtain. Next – a run down of how I made the upholstery.