Tag Archives: airstream

Airstream Interior Painting

Now that the Airstream has been moved down to its regular location, we’re moving on to the next steps, which is any final bits needed to close up the ceiling panel and interior painting.

First, we got some good rain (which we needed)…of course it showed four spots that I still had very small leaks in. One near the replaced picture window (rivet leak), one on the door hinge bolts (runs through the threads), one at the back curb side (unclear initially), and one in the stack windows on the street side.

Ultimately, the leak for the picture window and stack windows were straightforward – hitting it with Captain Tolley’s Creeping Crack Cure a few times sealed up wherever it was leaking. The rear curb side turned out to be a loose screw holding in the awning support bracket – upsized the screw for a tight fit then multi-layered sealed it during re-installation with butyl caulk and Trempro 635. The door hinge bolts were more of an issue. I tried multiple things to stop it – covering the bolt heads, more Captain Tolley’s, etc. Nothing would work. I did not want to take them out because the door works and is square and the bolts are a bit rusty. I could be creating more problems than I am solving. Ultimately my solution was to simply deal with the drip leak. Because it ran alongside the aluminum door edge, I used sheet plastic to encase the area all around and created a run for the water to drip down to the belly pan area, where it will evaporate\drain out. Keeping it off the wood floor so it does not rot is the ultimately goal. Success!

To close up the ceiling I needed to clean up the wiring bundles and complete any items, like the solar panel port, that needed installation. I also had to cut all the holes and prepare the wiring for the LED puck lighting we were installing. This took some time because there are a lot of wires to work with. Ultimately I needed to tuck and zip tie wiring where appropriate, then carefully work insulation into the areas around it. Unlike the original layout, we are also putting the overhead lights on regular switches, and had them in three groups (Front, kitchen\middle, bedroom.) I had pre-ran wires for the switches before we installed the insulation. When that was completed, I spent an evening getting the ceiling panel re-installed, which was a chore in itself. It is also 20 feet long, but it slips into two channels on the ceiling, so it was mostly a task of working it in and not accidentally bending or damaging the channel as you do it.

I took the time to do a tape layout on the floor as well to help us visual where things would land. This allows us to think more about the next steps as we move along too.

Finally, we’re on to painting. Stephen has been asking and looking for ways he could help – helping do the primer coat turned out to be a great way for him to contribute. We did a single coat of Insl-X Aqua Lock Primer Sealer. The interior walls are aluminum covered in a vinyl. Over the years, the glues in them can surface and become tacky – often called “mouse fur.” So the Aqua Lock is a product to prevent that from happening, and give a good base for paint.

Last, we put on a good coat of finish paint. We are using a color that we we use in our house – a historic preservation color known as “Outlands Subtle Taupe.” It’s a relatively neutral light gray. Getting things painted made a huge difference in how the interior looked – gone were all the color variations and markings from the old interior attachments, and now the whole place is a single, unified color.

Up next is electrical installation, repair of the rear bumper and more interior finish bits.

Airstream Interior Skins and Moving

In our previous post, we left with the interior insulation being completed. At this point, we’re now beginning to really put back together all of the various pieces and components that we previously took apart.

The first and biggest part is to get the interior aluminum skins back in and re-attached properly. This starts with the end caps. These are molded plastic parts that fit the complex curves in these areas. This was a multi-person job – my nephew popped over to lend some muscle help to Mary and I so we could get them pushed into place and riveted back up. It was a struggle, but eventually we got it fitted back in tightly and hit (most of) the existing rivet holes. Our choice of insulation might have made this a little more difficult – mineral wool is more dense than fiberglass and while I made sure the batts were flush with the ribs, it’s quite possible that we had to compress them somewhat as we fit things together, meaning more effort on our part.

Hitting those rivet holes brings up a good point – we have been careful while doing disassembly\reassembly to plan out what we can and can’t reuse. Generally if it was metal, it can be cleaned and re-used, and if not it has to be replaced. When it comes to attaching things with rivets, it’s far, far easier to re-use the existing rivet holes. One, it means you are not drilling additional holes into things (leaving other existing holes unfilled) and, two, when attaching the skins and caps back on, hitting the rivet holes help you to know that you got a tight fit that matched the factory without having to do lots of additional measuring and checking.

After the end caps, I steadily worked on installing the panels. The pieces on the ends go on first, and I was able to use the lap markings to make sure I put them on in the correct layered order, which makes them look visually correct (ie, horizontal lines match across the trailer, etc.) These panels are small enough to be a one-person job. Given the new sub flooring that was installed, sometimes I did have to trim the bottom edge of the panels a little for a good fit. There is also a bit of investigative work here – I need to put rivets in to hold the piece up, but some rivet holes are lapped with other pieces that I have yet to put in, so they are left with no rivets until later. This took some time and sometimes I had to remove fresh rivets I put in.

After the panels for the ends are installed, the next step is the long panels running down the sides. You might think that it would be easier to put these panels vertically so they are easier to handle, and it probably is. But Airstream installs them in very long single panels from front to back. I do not know this definitively, but I suspect\assume it has to do with adding structural integrity – the long panels riveted down the length likely add rigidity once attached across multiple ribs. The exterior panels follow the same pattern.

These panels are installed from the bottom up, in three rows on each side. The lowest panel is very straightforward, the middle panel is a mild hassle…but the top panel is an absolute, terrible, no good beast. It fits into a concave curve, is 20 feet long, weighs 100lbs, and wants to flop and bend repeatedly. My nephew came over again to help, along with my brother in law. It took all four of us to do it, and we probably could have used another set of hands still. Getting the top panels up took a lot of effort – we first tried putting them in by attaching the bottom edge and working our way upward, but ultimately could not flex it correctly to hit the rivet holes. Going the reverse direction – pinning the top and working our way down – was more successful. Using this method we got the panels hung and mostly pinned, leaving the lower rivets to be done later by Mary and I. To do those, we had to work rivet by rivet, pushing the panel up into place to get the holes where the panels meet to line up and then line up over the attachment hole in the rib. It was a bear, but it got done.

On the subject of rivets. There are an enormous number of rivets on these interior panels. I bought a bag of 1,000 rivets in bulk…and used them plus at least another 500 or so bought locally in smaller packs. There are a LOT of rivets. Airstream likes to note there are somewhere around 4,000 rivets in the average trailer.

With the panels installed I got prepared for another big step – moving the Airstream from the side of our road into its “regular” home in our backyard. I was a little hesitant to move it around before installing the panels since I knew they added to the rigidity of the unit. A few years ago we built a shed (I really should post “part 2” of that…) and I ran electric to it (50amp) as well, so it offers a great location to park it and offer utility connections. We plan on having the Airstream be used as a guest house for friends when not being used to travel.

The updates here on the blog are actually several weeks behind where I currently am at – will be posting a bit more frequently as I catch up to my current progress.

Up next, paint and interior bits!

Vintage Airstream Insulation, Wiring, and Subfloor

We’ve been making steady progress on our Airstream renovation project. In the last update, we had put all of the exterior bits back on, water tested and replaced a bad piece of belly pan aluminum. I did forget to note that I moved the power inlet port, replacing it with a SmartPlug 30A connector (big upgrade from original), added an exterior cable\antenna jack, and moved the city water inlet onto the street side of the trailer from the underside.

Next comes the subfloor, wiring and insulation install. Airstreams of this vintage used pink fiberglass insulation underneath the floor – they would lay a long batt across the frame and then sandwich it between the wood and the frame member to hold it up off the belly pan. This falls into the category of “seemed like a good idea at the time.” Fiberglass insulation wicks water, is faced with a paper vapor barrier, and it just so happens that rodents absolutely love it as nesting material. Needless to say, it led to lots of problems. Their competitors, like Avion, used polyiso foam board, which is much better.

A brand new Airstream coming off the factory today uses only reflective foil insulation under the floor. This is plastic bubble wrap coated with aluminum on each side. It provides some insulation value and most of its power comes from being a radiant energy barrier – it prevents heat from passing through effectively. I wanted to go one better than this, so in addition to reflectix (the common name of that insulation), we would add batts of rock wool insulation at the same thickness as the walls – this assembly has an insulation value of about R8 or 9 and provides a radiant barrier. I did some trial and error with placement and, once satisfied, we began to put in the flooring. Each piece received a coating of TotalBoat Penetrating Epoxy, and the cut edges got a coating just before installation as well. This will help minimize any wicking of moisture into the wood as well.

To install the flooring, we start at the ends. We have chosen to do a “shell on” renovation, meaning we did not detach the upper shell from the trailer frame and separate them. Doing shell off allows you to replace the flooring in full sheets just like the factory, but it creates a lot of additional work re-attaching the two parts together, particularly if your trailer is, overall, in good repair. So for our project, we put each sheet in as two parts, and made all of the joints line up with existing trailer beams. The curves were by far the hardest part, taking a lot of trial and error to get correct. Overall it took about a week working in the evenings to get all of the floor pieces cut and installed. As I went along I re-installed the various elevator bolts that secure the frame through the floor and to the shell. I did hold out the last piece for awhile to allow easy access to the waste tanks while I was still re-installing the valves and making sure they were sealed.

After the flooring was installed the next step was making sure the interior wiring was completed. I saved all of the low-voltage (12V) wiring, which was in good repair, but replaced the 120V city power wiring, in part because we were adding several receptacles and I wanted to upgrade this wiring from regular household Romex-style wiring to “boat cable.” Boat cable is upgraded power cable made for, as the same implies, boats…which are basically always wet. Instead of solid wire, it is stranded and tinned (the copper wire is coated with tin.) This makes it much more flexible, resistant to breakage from flexing, and resistant to corrosion from moisture. Stephen helped me tear out all of the existing wiring, then I spent the better part of a week working through all of the existing wiring. This meant taking out wiring that was no longer needed, such as the tank monitoring wires (replaced by a single wire system), and relocating certain components to the new locations in our layout (ie, pump switches, light switches, etc.) I also took this time to review all of the connections in the 12V panel and, using the owner’s manual wiring diagrams, ensured everything was correctly installed. I added two solar panel ports as well – a front-mounted port for a portable system and a roof port (fed by 6 gauge wire) in the event we ever want to add panels in the future. Along with this, I installed the rear monitoring\backup camera and the antenna for the cellular booster.

With wiring all cleaned up and ready, insulation came next. I have been a big fan of rock wool\mineral wool for many years now. It is vastly superior to fiberglass insulation in basically every way and in a project like this it makes a lot of sense to use. It repels water, is fire resistant, and is rot\mold resistant. It is easier to handle and install – you can cut it with a serrated knife like a loaf of bread and it is dimensionally stable, so it will friction fit into many openings without additional tools. To install it in an Airstream, you have to cut it down – the walls are only a bit more than 1.5″ thick. So you take a standard 2×4 insulation batt (nominal thickness about 3.5 inches) and slice it in half. On the upper portions of the shell I also installed reflectix against the aluminum skin – this should act as a moderate thermal break, reducing how quickly heat from the sun transfers into the interior side.

Installing the insulation is time consuming, but really satisfying. You see a lot of real progress as you work, and overall its like putting together a puzzle to get everything to fit. On the upper portions I did have to use a light spray adhesive (similar to the factory) so the insulation would stick until the interior panels are put back in.

Next up, re-installation of the interior panels and beginning to work on all of the inside bits.

Staycation 2.0

A lot has happened on our Airstream renovation in the three weeks since the last update. I was taking a week of vacation and we had a list of tasks to complete on the Airstream. We also have a high-level timeline. To start, let’s review the staycation goals:

  • Finish removing old wood flooring
  • Finish preparation of trailer frame including wire brushing, priming and painting.
  • Rebuild picture window, stretch goal of having window installed.
  • Clean (paint strip) the exterior.

How did we do? Well, we hit all of our goals. Huzzah! The stretch goal was not doable – I had the old window removed, but we did not install the new window until the middle of the following week.

I went back to work the following week and we did more small things each day, but I then took a second staycation week during the last week of the month too. The goal here was to get the sub flooring installed – more on that later.

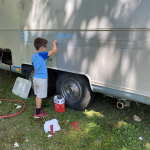
Cleaning up the frame of the trailer and and the exterior took an enormous amount of time during the week. This process took the bulk of our time. We used Rustoleum Aircraft Remover and slowly worked our way around the whole exterior of the trailer. Fortunately for us the clear coat had been stripped off previously, so we were left to focus on the stripe, the belly wraps, and the roof. But even so, this took all week. Stephen wanted to help as well, so he got in the action.

For the frame, I finished pulling the remaining wood out and wire brushed the whole thing. Our frame was in generally very good shape – only the bottom edges of the outriggers had real rust issues. We used Corroseal rust coverting primer on the whole frame to prep (seen in picture below – the one with white stuff on the frame.) Finally we painted the frame with Rustoleum Gloss Black enamel and used a catalyst hardener to make the finished paint extremely durable. You can see in the photos of the tongue how much of a difference just the corroseal makes.

The windows in this Airstream are dual-pane. The factory made them in-house. They are basically two panes of glass with butyl putty, some spacers, desiccant sprinkled in the putty, and a foil wrap with a vinyl gasket inside a frame. This setup inevitably let in some moisture and over the years they often get hazy. Fortunately ours have tinted glass panes and not a tint applied. The applied tint almost always bubbles up. Because this window is fixed, it is extremely difficult to remove and re-install. As such, I decided it would be appropriate to rebuild it now before reinstallation. Fortunately there is a guy who runs a place called Vintage Trailer Gaskets and he has lots of documentation on how to do the job and stocks all of the parts needed. So, with $40 of needed parts in my hands I set out to disassemble the old window, clean it all up, and rebuild it. It took some effort to dismantle the frame, but once that was done everything went smoothly. We reinstalled the window the following week. Those little items that look like bullets are called clecos. They are a temporary fastener for riveting that hold your pieces together while you work.

Speaking on re-installing the window. Doing so ultimately requires you to learn how to do buck riveting. Buck rivets are the type of rivets used on the exterior panels of Airstreams (and airplanes.) A buck rivet is extremely strong and essentially water tight when done correctly. It is superior to a pop rivet. The catch is that to put in a buck rivet, you have to have access to both sides of the rivet, with a second person holding a “bucking bar” (essentially a small anvil) so that you can smash the rivet correctly. Airstream has a nice rundown of how this all works. I picked up a pneumatic rivet gun and rivet set, bought some rivets and set on our way. I did some practice riveting and it took Mary and I a few tries to get the process down correctly, but now we can do buck rivets anywhere. Since we had all the interior skins off anyways, after we were done installing the picture window we went around and buck riveted in any other holes we found from other things (particularly in the roof) like pop rivets for old attached items.

For my second staycation week, the goal was to have the subfloor installed. However, at the beginning of the week it dawned on me that I didn’t want to install a subfloor until I know that the trailer was water tight (or at least with no significant leaks. It is an aluminum tube with 4000 rivet holes, after all.) So, my focus for most of the beginning of the week was to get all of the exterior “bits” put back together and reinstalled. This meant installing all of the lighting, badges, roof vents, etc, that we had previously taken off.

I rebuilt the tail light assembly using a kit I found on eBay with the same lenses. I modified that kit’s buckets to fit into the Airstream frame, which is curved. One interesting features of this era of Airstream trailers is a fiber-optic tail light indicator. Basically one of the tail lights on each side has a lens that feeds light into a fiber cable and the other end appears on the street (driver’s) side of the trailer towards the front. It is visible in your rear view mirror when driving and allows you to verify that the trailer’s tail lights are functioning. I modified the buckets from the replacement assembly to take the fiber optic monitor as well. For the marker lights I modified them as well with eyelet connectors for their neutral wires. Because the shell of an Airstream is metal, most lighting uses the aluminum shell as the neutral. The fastest way to do this is to add an eyelet to the neutral wire that is fed through the mounting screw.

By mid-week we had all of the exterior accessories back on, had installed replacement items like the new bathroom fan, and had done a first-step polishing around the spots where all those accessories go. I repaired one of the vent skylights that was clearly leaking and we installed a patch where the battery box used to be (we are using AGM batteries that do not need an exterior panel.) After installing the trailer umbilical, we tested the exterior lighting using the Jeep and everything looked great.

The last step was a water test. This took a few days – testing was done, leaks were checked and sealed, then another test was done, etc. It took four tests to get things satisfactory. There are two competing design goals for water here. First, you want to minimize leaks as much as possible. Two, you know water will get in eventually, so we need to make sure it gets out easily so it doesn’t cause damage. Satisfying part one takes some trial and error. To satisfy part two, the best approach is to use materials that are less likely to be damaged by water exposure and plan for what happens when water does get in.

The last thing I did was install some new belly pan where the old one was damaged beyond repair. I bought enough to do most of the belly aluminum, but will hold off until next year as what’s there is in decent condition, though with some minor corrosion.

With those steps done, we were finally ready to start installing some flooring. We did some test fitting of the first pieces – the rear curve – at the end of the weekend. So our revised goal is to have the subfloor installed by the end of Labor Day weekend. We’ll see how we do!

Finishing Demo and Staycation Goals

We’re just over four weeks into having this Airstream trailer project. We have set what we think are realistic goals for the work – ultimately, this will be ready for regular use by Spring, and it may be able to do some “backyard tests” in late Fall. To keep on that schedule, we have some high-level milestones. The first was that by the end of July we would have the interior “skins” (inside aluminum panels) and the floor removed. By the end of August we would like to have new flooring in, with a stretch goal of having some interior skins back on. I mentioned previously we’re not the first people to do this – there are a lot of great resources, other blogs chronicling their work, and YouTube videos documenting key processes out there. We’ve done a lot of reading and watching to know what to expect and what we should be doing.

Work on a project of this nature is like building yourself a small house – there’s lots of little details you have to keep up with along the way and they all have to come together successfully and in order to keep you on track. You don’t want to put the interior skins back on only to realize you forgot critical wiring that should have been done first. I have a Word document filled with all sorts of things to purchase with an attempt to keep those items organized together to when they are needed. In the last week I began purchasing lots of items from various places – so many that our credit card company put a fraud alert on our card and I had to call in to confirm that, yes, I was in fact making lots of purchases all over the Internet.

In the previous post, we had gutted the interior space and disposed of it. We saved the bits that were needed for the rebuild – metal fasteners, bent aluminum channels that match the wall curvature to re-use with new walls, etc. The next task was to get done what was the most disgusting part of the job – taking down the interior skins and removing the rodent nested insulation.

Taking down the interior skins was pretty straightforward – after removing everything attached to the walls, we carefully drill out the pop rivets holding it in, starting at the top. There are several very large pieces, and a number of small pieces for spots between window frames, etc. After getting these down we took a pressure washer to them and gave them a good, thorough cleaning and then rolled them up to be stored for the next month or so. Oh, this turtle also walked across our lawn while I was working on things, too.

That left the insulation. There is no way to get around it – it was gross and smelled terrible. But it was expected. We cleaned all of the insulation out and disposed of it as well, leaving the walls reasonably clean. You can see in the picture the wiring – all of this was tested and is in good shape. I plan to retain the 12V wiring (the majority that is pictured) and replace the 120V wiring with new stranded marine wire which is better suited to an application like a trailer where things are bouncing around.

The next step was to get out the flooring. The fastest way to do this is to set a circular saw to just below the depth of the plywood and make cuts around the fasteners in the frame. You lift the plywood off, chip off the remaining chunk around the bolt head and use a pipe wrench to grab the head and back it out. That process worked great. You can see in the pictures that as well picked up the flooring there was very little underneath. That was because rodents had taken all of that insulation over the years, cleaning it out.

The last step is to get the frame prepared. Our frame was in excellent condition – no metal is rusted to the point of needing replacement, and all is structurally sound. A basic wire brush treatment to clean things off and knock back any surface contaminants is all that is needed, then applying a rust converting primer followed by a priming protectant. My brother in law came over and helped wire brush a good chunk of the trailer, and some of the kids helped – here is a picture of my brother in law and Stephen doing that work.

That brings us up to today. Because of the pandemic, we’re not really going anywhere for vacations this year as we had planned, so I’m taking some time off work to use up accrued vacation and use the time to work on the Airstream. So, this week we have set ourselves some goals:

  • Finish removal remaining wood floor bits – the area around the wheel wells is all that remains.
  • Finish the trailer preparation and have it ready for flooring – finish wire brushing, paint with primer, then paint with rust inhibiting paint.
  • Rebuild the replacement picture window – the 30×30 fixed window next to the door had a broken outside pane and I got a used replacement from Out of Doors Mart and a rebuild kit from Vintage Trailer Gaskets. Because it is dual-pane and it has to be riveted in, now is the time to rebuild it so the inside panes are dry and clear. The other windows will be rebuilt over time, probably next year. Stretch goal is to have the window fully installed.
  • Clean the exterior back to metal – removing the elastomeric white paint on the roof, clearing any exterior bits (lights, etc), removing the blue stripe, and test some first-pass polishes. We won’t finish polish now, but want the exterior to be finished with paint strippers and nasty chemicals before we put the exterior bits like lights on, which we want to do before we put all of the interior skins back on.

So – that’s our next 8-9 days of work – we’ll see how far we get!