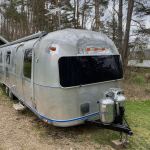
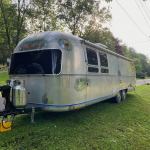
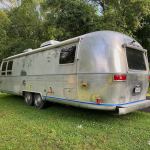
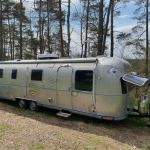
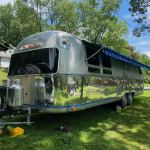
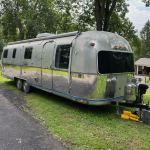
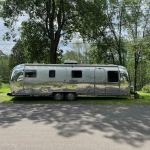
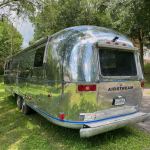
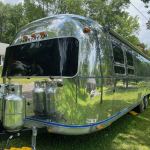
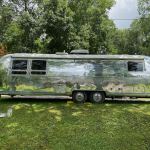
Finally in the home stretch of the Airstream renovation – exterior polishing! From reading up on this, I knew that polishing is a brutally hard, long and dirty job. But the results at the end are pretty incredible.
For those not in the know – the aluminum panels on an Airstream can be polished to a relatively high shine with a lot of elbow grease. Different years can polish to different levels of shine, as Airstream changed the alloy used in the panels over the years. But, broadly speaking, Airstreams built before roughly 1982 used Alclad aluminum panels, which have a pure aluminum coating and can be polished to the highest mirror-like shine.
There are several different compounds for polishing aluminum. One of the most common is Nuvite, which is a polish made for aluminum aircraft. Nuvite is applied with an orbital buffer. I chose to use polishing bars which are applied with a side grinder using a buffing wheel. I tried both and felt that I could get good results with the polishing bars but it would be more economical than Nuvite. I used the kit for large Airstreams from Jestco Products.
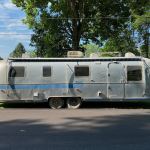
So, this is how the Airstream looked before buffing:
Buffing aluminum is a multi-step process. Airstreams originally came with a sealant coating on them, so if it still exists on your trailer you have to strip it off like paint. Fortunately for our trailer, this had been done sometime in the past so we did not have to worry about it.
But for polishing, the first step is to make sure your surfaces are reasonably clean of dirt and debris. The second step is to use the gray “abrasive” compound as a first pass. This pass really does the heavy lifting – you can watch as it goes from dull to shiny more or less all at once. But, it is very slow. You are working on a thirty foot, eight foot tall trailer…one inch at a time using the tiny edge of a buffing wheel. Did I mention the mess? You need to wear a respirator for this process because it creates a cloud of black dust that gets on everything. When polishing I would set aside a few hours to work then immediately come in and take a shower.
After the gray compound, you get a nice finish but it will be full of very visible swirls and be relatively uneven, as you can see below.
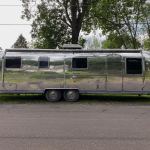
Step three is the red polishing compound, commonly called red (or jewelers) rouge. Rouge is made for polishing already shiny metals and adds luster. The rouge will smooth out many of the swirls and unevenness from the gray compound. When you are done with the rouge you should have a really nice finish. Under most lights it will look great, though you can certainly get to certain angles where you can still see shadows of swirls and the like. You can see below, it looks great.
If you’re really up for punishing yourself, you can do the last step which is to go over the whole trailer one more time using an orbital buffer and a metal polish such as Blue Wenol. I tried this on some sample spots and did not see a noticeable enough change in the finish to want to do the whole trailer again, so I stopped a the rouge step and instead focused on cleaning up the buffing compound’s residue. This mostly involves taking rags soaked in acetone and wiping down the surface. Be warned you go through lots of rags and they are garbage when you are done.
The finished result is amazing. A polished trailer like this will slowly oxidize back to the pale gray it was when we got it, generally 5-7 years. You can slow this process down by putting on a sealant or protectant (a plasticizer is traditional), but they wear off after about 10-12 years and the trailer will resume oxidizing. In addition, if it partially fails (ie, the top starts peeling before the sides, which is super common) you have to strip the whole thing, which is a ton of work. Some people are starting to put ceramic coatings on their trailers, which is a new option. Ceramic coatings last a long time, can be reapplied easily, and don’t have the drawbacks of a plastic coating.
Or, if you forgo all of those coatings, you can just to a touch up polishing job every other year or so. Once your trailer is polished nice, you no longer have to continually do the gray polish, you only need to go over it with the red rouge. At least for now, I intend to follow the rouge route and see how I feel in a year or two when its time to touch the polish up.
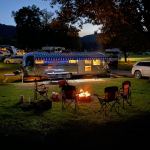
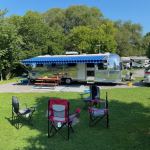
With the trailer polished, it’s really completed. I did this polishing right at the beginning of the summer and we were able to use the Airstream throughout the summer. We mostly camped at a large park locally by the river, but did get a few trips in towing it to make sure everything was working well.
I think its also worth a comparison shot – the first one below is the trailer the day we picked it up. The second is the finished trailer.
Next up is a full tour of the trailer and everything put together to complete this project!

