One of the things we knew before we ever moved in was that we had some work to do in the kitchen – new appliances, wallpaper, flooring, etc. We did start with some awesome things though: a good layout, a fabulous banquette and really nice Wood-Mode cabinets with every accessory you could want built in topped with nice Corian counters.
Over the years my Grandparents had put a few different floors down. The one at the time we moved in was linoleum, about 8-10 years old. I remember when it was being chosen, though I didn’t have a lot to do with it. I wanted to replace the kitchen floor as quickly as possible since we had a number of other projects depending on that being done (or were easier if it was done.) So off I went, to figure out how to get a floor that will look good, be durable, and be harmonious with the rest of the house.
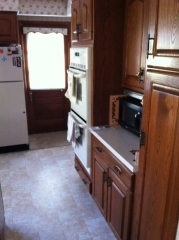
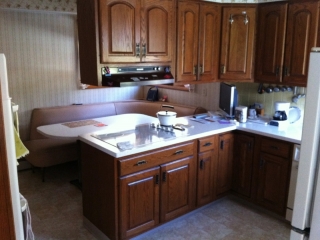
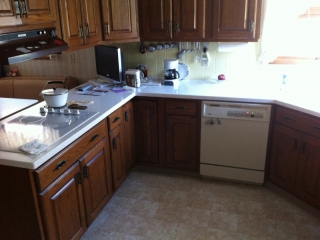
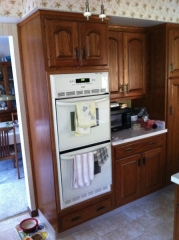
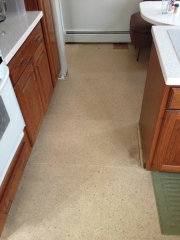
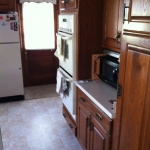
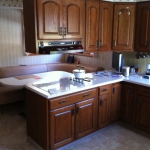
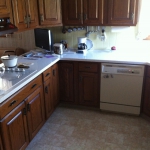
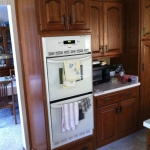
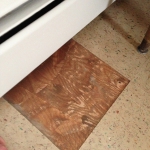
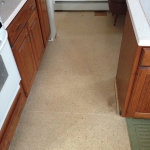
Here are some before shots with the linoleum and room as it looked when we moved in:
As it turned out after this linoleum was installed, it clashed with everything else. It was a square pattern in a beige tone. Grandma was ok with it, but I couldn’t wait to get it out. Not only did it clash but because it had an underlayment, the floor height stepped up 1/3 of an inch higher than the foyer and dining room floors where they met. Over the years some details had been overlooked as well: for example in the pictures, you can see beige colored base coving – the original color (and one that looked best) was chocolate brown.
I was cautious heading into this because I didn’t know what I would be finding underneath. A few months after moving in I finally got ambitious one night and began pulling up sections of the linoleum to have a look at the luan underneath. As with most projects, there were some unexpected finds. Like, when they put down the luan underlayment, your flooring installers run ragged over your entire floor with a pneumatic staple gun.
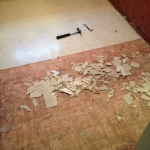
Pulling the linoleum wasn’t that hard. Pull a section, cut into pieces, put at the curb for refuse. Now we’re left with the rough luan surface – not ideal but we can walk on it for a week or so and hope we don’t get any splinters. Next up: I pulled up the luan. Also not hard, except that as I get underneath, I realize that the 926 staples that they used to put each sheet down on the floor don’t pop up with the underlayment. So now I have 926 staples poking up through the floor – not cool. On to staple pulling duty I went, using a pair of vise grips and sitting on the floor for an evening pulling every. single. staple.
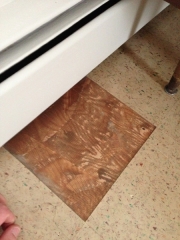
Turns out the original flooring was never removed, it was simply covered over. Unfortunately because of the hundreds of staples put through it, this floor is not salvageable. It is an 8 inch VCT tile. It is possible it is asbestos tile. But, I do discover that the original floor was designed to be level with the foyer and dining floors. Excellent, Smithers. Here’s the original tile floor:
Let’s talk about asbestos tile for a second since I’m sure I’ll get some comments. For those scared of asbestos – it is dangerous in certain forms, yes. I don’t know if this tile had it or not. It’s difficult to tell by looking at it, though some types of tile (like our downstairs tile) is much more obvious than others. There is a thing about asbestos tile: asbestos is dangerous if it is “friable” and can be made airborne. The small amount of fibers that are in the matrix of your tile is not going to be freed from said matrix short of you taking a belt sander to your tile. Chipping it up, even in pieces, is not a huge deal. You should follow some basic precautions per the EPA: dampen the floor (minimizes dust) and wear a dust mask. It is other types of asbestos (especially pipes wrapped with the stuff) that are extremely dangerous unless you take precautions. My disclaimer: I am only describing my experience and my research. You should always consult with a professional if you have doubts or do your own research.
Back to our story: Staple pulling duty was no fun. But the linoleum floor that I removed was not the first one put down – a fact I knew, but hadn’t thought much about. My grandparents put a linoleum floor down when they renovated the kitchen in 1986 as well. When that floor was removed in the early 2000s and there were hundreds of staples sticking up then…what do you think was done? They hammed those staples flat into the tile! Yay! So now when I went to chip up the tile, I had to remove the tile in chunks AND work around hundreds more staples. Then I had to go back (again) and pull all those staples too. Best investment of this project? A large pair of vise grips.
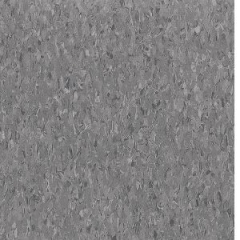
At this point I had everything down to the subfloor. The original tile ran underneath the cabinets, so I just removed the tile up to the cabinet edges. Now it was time to begin searching and decision making for a new floor. What do we want? It had to be mid-century compatible, for starters. We started with linoleum since it seemed the go-to. But I had a vision for the floor that, if it was linoleum (or any sheet flooring), I would want a non-patterned monolithic look. We came up no dice there in spite of a few weeks of effort. I also kept poking around on vinyl tile flooring since it was the most compatible – our foyer floor has beautiful 8 inch vinyl tile. But I wanted something a little more snappy than Armstrong Excelon 12×12 tile, which is easily the standard go-to tile for mid-century remodeling. This is Excelon, a tile you know well because it, quite literally, is everywhere in commercial buildings:
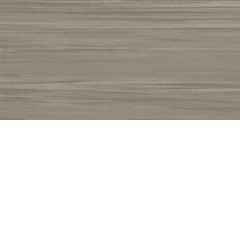
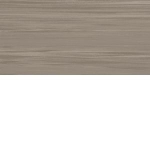
I eventually came across two new tile series from Armstrong: Raffia and Striations. Both are awesome. Raffia is a traditional vinyl composite tile but made in a 12×24 rectangular length instead of square, and the pattern on the tile is similar to Exelon, but has more continuous lines instead of flecks. I picked up a sample board from a really great local vendor, Warehouse Carpet in Johnson City, and had a look. They also ordered a sample box (there are no sample boards, to reduce wast (supposedly)) of the Striations tile. Here are Raffia (top) and Striations (bottom):
Raffia looked good. But once I got my hands on the Striations sample, Mary and I were both sold. It was spectacular. Armstrong Striations tile is a commercial tile (like Raffia), but in a new formula they call “Bio-Based Tile” – it is 80% limestone and is “rapidly renewable.” It’s heavy, too. But it installs just like VCT tile. This tile comes in 12 x 24 rectangular size, like the Raffia, but it has these very unique grain lines running the length of the tile. There are a lot of great colors to choose from; we ultimately decided to go for a darker grey with a touch of brown called “stardust.” I ordered them up and a few weeks later they came in and I began experimenting with sample layouts:
Looking at the rest of the house, I already knew that we wanted the grain lines to go the same direction as the lines in the wood flooring. If you look at the overall foyer area from the balcony, you will notice that all flooring except the foyer floor has grain going in one direction. The foyer, being the central area of the house, has its flooring on a 45 degree bias. A nice touch that sets it apart from the rest of the flooring.
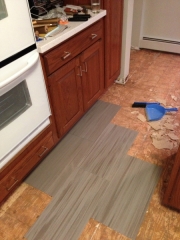
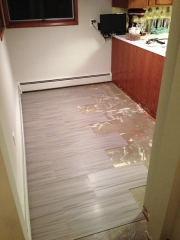
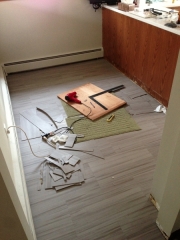
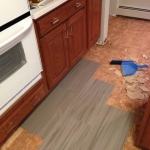
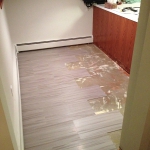
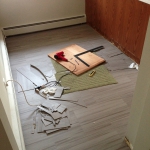
With that, I prepared everything for tile installation. Because I had an old plywood subfloor, there were joints that needed to be patched up. That was taken care of with some thinset compound, spread in a very thin (1/16 of an inch mostly) layer across the floor, paying particular attention to the joints. Once this dried I got out the adhesive and troweled it down. Cool thing about VCT adhesive? You can lay tile on it for about 8 hours after putting it on the floor. So you spread your entire floor with adhesive, then lay your first tile near the door and work your way in – as soon as you lay a tile you can stand on it. The adhesive takes weeks to cure, and always retains some stickiness. Here are the some tile installation progress shots:
Once you lay out your full size pieces you go back and do the pieces that require cuts. It’s easy: You measure off what you want, score the line with a utility knife, then bend the tile. It will snap on the score mark. For corners and such you need to heat the tile with a blow dryer or heat gun and you can tear the piece along the score mark.
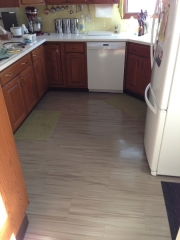
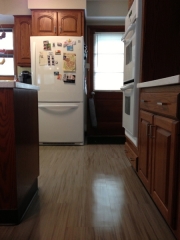
Lastly, I had to focus on the details such as base coving. I chose a standard chocolate brown for two reasons: first, it’s what was there originally. Second it was a much better match. The dark brown cabinets, when paired with the previous light beige coving, appeared to “float” visually. New dark base coving took care of that. In addition, the coving between the foyer (same stuff) and the kitchen lined up – something that hadn’t happened in 25 years.
We had a lot of other things to take care of in here. Some were already done by the time I did the floor. The list includes:
- Replace the pendant light above the table (we really liked the Astron line from Rejuvenation.)
- Reupholster the bench (already done – we chose Rialto from CF Stinson.)
- New appliances (done)
- Alter Wood-Mode cabinetry over peninsula to raise it up and put in range-hood microwave
- Remove the wallpaper and paint the room the same color as the rest of that level of the house (neutral taupe)
- Add new under-cabinet lighting
- New pulls and hardware
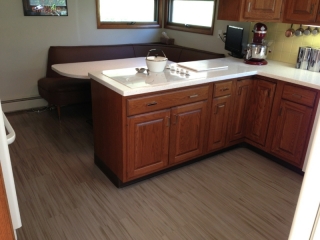
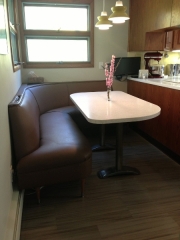
To see the whole thing start to finish, here is the entire gallery:


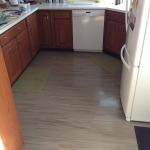
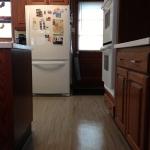
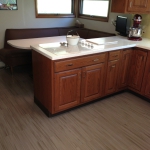
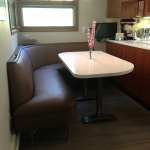
Love the new floor and the kitchen updates! That banquette looks very cosy. I love the term “mid-century compatible”. That describes my philosophy on updates exactly. We have asbestos tile in our basement. It’s in good shape and I’ve heard that it’s fine as long as it isn’t crumbling, but it still makes me nervous. So thanks for the filling me in on what you’ve learned.
Robert over at Live Better Electrically was worried about his tile too. Sitting on the floor it’s totally fine and won’t cause harm even if you’ve got kids playing all over it. If a tile pops up just glue it back down with regular tile adhesive. Old tile looks best when you clean it and wax it up though, in my opinion, and it’s an easy project with quick gratification. I have a procedure I posted on Robert’s blog, I should turn it into a post on here as well.
Thanks on the compliments, by the way! The banquette is probably one of the single most awesome things in the house (second to the radiant heat I recently repaired in the lower level.) We reupholstered it to that brown leather-like upholstery. Through old pictures I have been able to ascertain it has had five different coverings on it. It seems to get re-done about once every ten years.
The thing about Mid-Century Modern style to me was that it was, by nature, an incorporation of “modern” elements both technologically and from a design perspective. If some of the things we have now were available then, I know they’d be incorporated into MCM style. It’s not about being a time capsule, it’s really about being true to the tenets of it – simple and functional forms, minimal decoration and adornment, and letting the pieces (furniture, technology, building) be the feature, not the sideshow.
As I was reading through this I was thinking that you should try the Armstrong Striations, so it was pretty funny that, the further I read – you were already on it. It came out really nice. I discovered it while working on a school lobby project where I wanted the floor tile to match more with the mid-century characteristics of the building.
Things are looking great – keep up the good work!
Thanks Kim!
Years of exposure to architecture have clearly paid off. 😀
For VCT it’s expensive stuff but it really is a lot less than most other flooring options. Once all was said it done it ran about $4 a square foot. Granted that’s me doing the installation, but we did the whole room for about $650 – pretty cheap, really.
The floor looks amazing!! Does the striations have to be waxed like normal VCT?
Jason –
Thanks!
Yes, it’s treated and managed just like regular VCT. I need to write a post about it since you’re the second to ask, but basically you clean it, seal it with a coat or two, then later on 3-4 wax coats. No buffing needed if you get use the Zep products and all can be applied with a microfiber mop.
Thank you for your detailed information on Striations – I am looking to install it in my laundry room and have had a hard time finding folks who have used it in a residential setting. Your posts (here and on another blog) were very helpful. Can you tell me what you used to cut the tiles? Were they easy to work with? Thanks!
Hi Lisa –
Striations handles and installs just like regular VCT (vinyl) tile. To cut the tile you score it with a utility knife (use a straight edge to keep it square.) Once scored if the piece being cut is large (say, cutting a tile in half), you simply bend the piece backward and it will snap clean on the scoring mark. If it is a small piece (like a notch for a corner), you can use a heat gun or hair dryer to warm the tile first. Once it is warm you can break the piece out fairly easily. I found the tiles to be very easy to work with. They are heavier than VCT due to the size and content (they are mostly limestone.) Using the scoring and heat gun method you can easily trim out odd shapes like circles around posts, etc.
Since these tiles are rectangular, you will want to do some test layouts and plan your floor. I used a brick wall style pattern, but you have several options – herringbone patterns are pretty popular, for instance. You can also get some in a different color, cut then down to 12×12 and use them as borders or accent tiles.
Hope that helps, and good luck!
Thanks so much, I appreciate the information. I am about halfway through removal of the existing ceramic tile and am looking forward to my new Striations floor. Thanks again!
we are enjoying your piece here on striations and are thinking to use it throughout most of our midmod house.
We got a sample and it came with an end piece broken off, various scratches and some surface blemishes. Other than all that, we liked it pretty much the best of all things we have seen.
Has your floor seemed tough enough so far? We are going with the lightest of their colors which I wonder if we might regret later.
Also curious if the maintenance
seems like a big chore? Ideally would you want or need a small buffer or would that be overkill?
Thanks!!
Rob –
Thanks for checking it out! Just this last weekend I replaced the upstairs bathroom floor with Striations in “Atmosphere” as well (story to come on that), and it came out great. We really love the look of Striations, and it is very durable. Because of it’s makeup (mostly limestone) it is more durable than standard VCT tile, but it installs in exactly the same way as VCT and with the same ease. So we now have two rooms with different color Striations tile and it fits really well with the mid-mod look. Eventually we’ll put it in our downstairs family room (once we have the floor re-leveled.)
Here’s my tips for brand new Striations tile (I suppose I should make a separate post for this at some point! This is the most popular post on my blog):
1. The tile in the box has a “right” and “wrong” side to install – you will notice when you pick up the tile that one side is slightly (barely) smoother than the other – the wrong side with have a bit of texture. They pre-treat that side lightly to resist any staining during install and ensure a consistent gloss when you first seal and wax it.
2. After the tile is first installed, clean it with a nice neutral floor cleaner (you can get this at your tile place or big box store easily) which will give you a very nice, clean surface to start with. If there are any spots or marks, get a sponge with a light scrubbing side (not steel wool), dip it in the neutral cleaner, and scrub it a bit. It should come off and you’ll have a pristine floor.
3. Microfiber dry sweep the floor just before you’re ready to start sealing. It’ll help make sure no little hairs or dust get on there – but be warned you will always have one piece or two because it’s almost impossible to avoid eventually. Don’t fret it – no one notices but you.
4. Hit the floor with two or three coats of a floor sealer (I use the Zep variety, which can be applied with a mop. I get a Quickie microfiber one and it works well.) Wait 20-30 minutes between the coats. It goes on glossy and eventually the shine dies down as it dries. Make sure you go in a pattern or you will miss a spot. After the second or third coat you’ll see a noticeable difference in the floor.
5. Move on to wax. I use Zep Wet-Look wax because I want it super shiny. I use the same microfiber mop but I rinse it thoroughly between sealer and wax and wring it out extensively. The mop being slightly damp doesn’t seem to hurt it. For new Striations you need a LOT of coats to get it to start looking shiny – my floors have 7-8 coats. This applies the same way as the sealer – mop it on in a pattern, wait 15-20 minutes for it to dry. You’ll see shine starting to develop as you get more coats. It’s also important to note that thin coats are better than thick ones. Don’t save time by caking on 3 heavy coats – do 6 thin. You’ll thank yourself later.
As for our kitchen floor, it’s been a year since I installed it. Two weeks ago I cleaned it thoroughly (neutral floor cleaner) and then put two fresh topcoat of wax on it – really perked up the shine and gives a mirror-like finish. No buffing is necessary unless you need to remove the existing wax and sealer – at that point I would strong suggest renting a commercial buffer – it will save you a lot of time. You can strip with the buffer in an hour or two whereas by hand it would take you a day (and back-breaking effort.) Day to day though, a buffer is not needed with the Zep finish to keep it up. The tile and that was are designed for “commercial” high traffic which is significantly more traffic that you will see in your house (presumably. :))
Hope that helps, and thanks for reading!
Thanks for that thorough detailed explanation I am guessing we will proceed to buy a box to look at the color a bit better and then proceed.
My main qualm at this point is whether our floor will prove smooth enough
once I remove everything and whether
the color is too light. Other than that I wonder if all this shiny waxed tile is
slippery underfoot?
Thanks again i will see about posting photos when we get it done
You should be good on underlayment in most situations – I used the plywood underlayment that was originally on my floor, for instance. I removed the linoleum, luan underlayment, old tile and staples. I then used a cementitious patch (called “grey patch”) in larger areas that needed to be leveled or joints filled and a simpler white floor leveler patch on areas where it was just staple holes. The big deal is joints – if you have joints that have a lot of flex then you may need to consider an underlayment like luan first, but this will raise the floor slightly.
One nice thing about putting the tile in a mid mod house is that you do not have to get it perfect – your floor will have some natural undulations and those will show through in the finished tile. This is ok – and it will make your floor blend well with the rest of the house.
I realized today I forgot to answer your last question – the floor wax that I use (Zep Wet-Look Floor Finish) is inherently non-slip even though it has a glossy finish. If you have on the right socks (rayon usually) it will be less slip resistant, but under normal circumstances (bare feet, shoes, cotton socks) – slipping isn’t much of an issue because of the wax formulation.